


My Favorite Travel Planning Tool
- Andrea
- Apr 20, 2018
- 8 min read
Planning for our upcoming trip to New England is in full swing and I'm reminded of how much I rely on one tool more than anything else to keep track of where we want to go, which restaurants we might check out, where we're staying each night and which miscellaneous attractions fall close to our route. I've only begun using this resource for trip planning a year or two ago, but I can't imagine life without it! It will probably come as no surprise that this awesome tool is Google, but you might not be aware of everything that Google has to offer.
Many of us use Google to look for information. I can't tell you how many of my searches begin with "Things to do in..." and I'm rarely disappointed with the results. The real gem, though, when it comes to planning one of our trips is the My Maps feature that Google has. If you have a Google account, you have access to this great feature!
It takes a few clicks to get there from your Gmail, so click through the slideshow below for the easy steps, or you can also get there by going to https://www.google.com/mymaps.


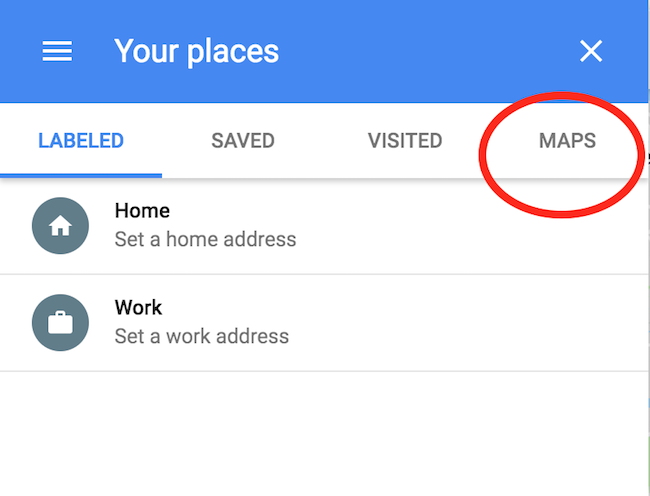


Once you've opened an existing map, you may see something like the image below. This is a view-only version.

Click "Open in My Maps" to edit and get to the good stuff.

This map feature has a LOT to offer. You can learn quite a bit just by poking around, but I'll show you how I use it.

Each map can have up to 10 layers. A layer is a subsection of your map that you can show/hide independently and it can be used in a variety of ways. For our purposes, I have divided the country into about five regions and have a main map for each. Within those maps, I have layers for our various trips. For example, in the image above, you'll see a portion of my "50 States - East" map with the "New England" layer open. At this stage in our planning, that map also has layers for the driving route and our Plan B (attractions that we're not planning to see but that are backups if something we planned for doesn't work out or if we find ourselves with some spare time). You can easily move items from one layer to another which is great when something gets bumped from Plan A to Plan B or vice versa.
You can see below my main New England layer on the left. I added my driving route layer in the middle. This isn't our exact route, but it gives us an idea of the main cities we'll hit so we can see how far out of our way some of the attractions on our list are. The picture on the right is both of those layers plus our "Plan B" layer. Most of the time I have this layer hidden because it adds a lot of clutter and, in all likelihood, it contains things we won't have time to see. In the off chance that we do, it's right there ready to view.


You can use layers for all kinds of purposes. We also have a map for local restaurants at home. We use the layers feature on that map to show restaurants we've tried, restaurants we still need to visit and coffee shops. You can use layers to show time periods as well. Maybe you visit the same place every year but explore new areas each time. Layers can help you distinguish between where you've been and the attractions on your list for next time. One last idea is to use layers for types of attractions. We have a master travel map of the U.S. (shown below) where I keep track of every interesting site, event, restaurant, etc. that I come across (including our National Parks and state capitols). When I hear of something that I want to add to the list, I go to my map and add it to the appropriate layer and when it's time to plan our next trip, I check that map to see what might be in that region. It's nice to have that part of the research ready and to have a go-to place to store it all when I come across new ideas.

How do you get your stuff on the layers? There are two options. The method I use the most is searching for an attraction in the search bar. This isn't 100% reliable, but, most of the time, what I'm looking for will come up in the search results. Note: I don't tend to use this tool to actually find places to visit. I usually use regular Google search and other resources to identify attractions and then use my Google Maps to catalog them for our travels. Click through the slides below to see how I search for what I want to add, click "Add to Map" to add it to my layer and then have option to edit the name, description and marker. This is the most convenient method because, if it's available in the search results, it will already have the exact address and often a website attached.


In the off chance that the place you're wanting to add doesn't come up in the search results, you can add a custom marker by clicking on the pin point icon (to the right of the hand icon below the search bar). That will let you drop a pin exactly where you need and name it whatever you want.

Once I've added something to my map, I may copy and paste a website into the description area or list any notes that will be helpful like how much the entrance fees are, when they open/close, etc. I also customize the marker style according to my particular system so I don't always have to click on each marker to remember what it is. In this map, I use a red knife/spoon icon to mark the restaurants we're interested in. I use a yellow bed symbol for each of our lodgings, a green tree symbol for natural attractions, a gold star for state capitols, etc. I also vary the color of the same symbol to indicate priority. For example, dark red restaurant symbols are restaurants that are "must try" whereas the regular red restaurant markers are lower on the list. There is a wide range of symbols and colors from which to choose, but you can also create your own custom symbols which I've done for things that don't have a good icon available like a church or castle. I also created one that indicates a watch set to 15 minutes for attractions that are just quick stops/photo ops.


You get get as structured or creative as you want with the markers. The possibilities are endless! For our local restaurant map, I have markers for favorites, highly recommended, just ok and not recommend restaurants. For our travels, I do quite a bit of planning by location, so it really helps me to see at a glance which attractions are near each other, which restaurants are in the area and how far anything is from where we're staying that night. Being able to customize markers has been a huge help.

There are some other miscellaneous tools in Google Maps that I find helpful. One is the ability to measure distance between two (or more points) with the ruler function. If you want to get a quick idea of how far it is from one place to another (and even be able to measure along certain roads/highways), this tool will let you draw from point to point and automatically calculate the miles in between.

The directions tool lets you plug in multiple locations to create a route between them. It saves them as a layer so you can show/hide the route whenever you need.

The "Draw a Line" tool allows you to create custom areas and also draw custom routes.
There are other available features like being able to export/import your layer information, the ability to share your map(s) with others with customizable privacy settings, and even the option to change the style of your base map (satellite view shown below).

Of course, one of the best things about this tool is the ability to access it everywhere we go. While I find it easiest to plan with Google Maps on my laptop, when we're out and about I use the app on my iPhone.
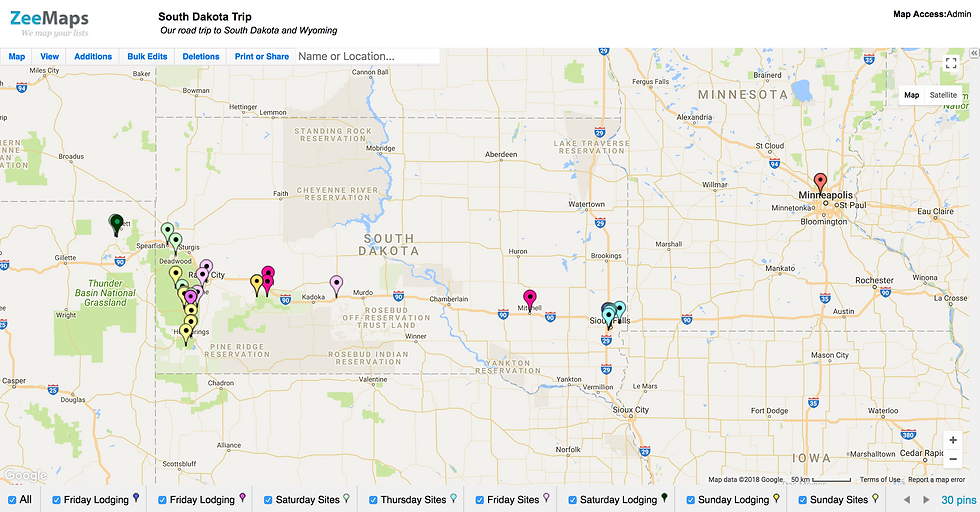
If you like the idea of using an interactive map, but don't have access to Google Maps, I have also used ZeeMaps. Below is a map I used for our road trip to South Dakota/Wyoming. ZeeMaps has some good tools but it doesn't feel as user friendly as Google Maps, doesn't let you change the style of the markers (only the color) and, as far as I can tell, it doesn't have a mobile app. When I first started getting into mapping our trips, though, this was really helpful. For that particular trip, I used different colors to indicate the days of our trip (for example, green represented what we would visit on Saturday and dark green was where we would stay that night). There was a lot we wanted to see so being able to view it in this way really helped us to come up with an efficient plan of attack. I have pretty much abandoned ZeeMaps in favor of Google Maps, but I still think it's a helpful resource.
Do you love maps like I do or did I exhaust you? This process may seem tedious or rigid, but we've found that we make the most of our time when we plan ahead and map out our schedule. Our upcoming trip to New England is a perfect example - there's no way we could see six states in 12 days without a good plan to keep us on track. In fact, we've discovered that the preparation we do up front allows us to be more spontaneous while we travel. When we've identified the sites that we're most looking forward to seeing (as well as good backups) we go into each area with our priorities set and if something comes up that changes that, we don't need to wonder if we're missing out on something else we would have wanted to see if we had known about it in advance. Researching different sites to make sure that they'll be available on the dates we plan to be there helps us not worry about wasting time on places that aren't open or that might close earlier than other sites on our list that we could visit later in the day. I'm inclined to agree with Aristotle who said that "through discipline comes freedom." I mean, he probably wasn't talking about planning a vacation but I think it still fits. ;)
We're not robots. No matter how much I've prepared and reviewed the schedule, we get tired, we find more than we were expected at certain sites (and less than expected at others), we get the urge to just sit on the beach or spend an extra half hour in bed in the morning because the resident cat was so cuddly. The schedule is never perfect and, inevitably, we will need to make changes on the fly, but our map keeps our options close at hand. I also have to say that I like creating and managing our travel maps. It's part of the fun for me because it extends the excitement of exploring a new region to way before we even leave the house. Would I spend this much time and energy on something that I didn't enjoy just to feel prepared? Probably not. The important thing is that you enjoy your time away (and that you don't pull your hair out planning for it). If having a detailed plan stresses you out - ditch it! But if having a plan helps your travels run smoothly and helps you enjoy the process, I hope you'll enjoy using Google Maps like I do.
Happy Trails!


Comments